Precision Chamfering and Edge Finishing Techniques for Small Onyx Accessories
Precision edge finishing for small onyx accessories starts with the correct material identity, a clearly drawn edge profile, and supported processing on representative stone. Define the chamfer or radius separately from the surface finish, preserve functional dimensions during polishing, and approve both measured geometry and visual acceptance criteria on a physical sample before confirming the production specification.
Published
Updated
Identify the onyx before specifying the edge
In decorative stone manufacturing, “onyx” often means calcite-based onyx marble. Gemological onyx is a banded form of chalcedony, a quartz material. Oxford University Museum of Natural History explains this naming distinction; the two should not share an assumed processing specification. A commercial color name or a reference photograph does not establish mineral identity. Oxford University Museum guide
For a tray, box lid, display base, or desk accessory, identify the proposed stone and examine representative samples. Record visible bands, open discontinuities, filled areas, and the intended orientation of the finished object. A vein crossing a narrow corner deserves closer evaluation, but a decorative vein should not automatically be classified as a crack.
The recommendations below are a design and prototype-review framework. They are not a record of DeHong Stone's equipment, production tolerances, or validated machining parameters. Final methods and achievable limits require a written review of the selected material and geometry.
Define the edge geometry and its purpose
“Smooth edges” leaves several decisions unresolved. A chamfer is a flat bevel between adjacent faces; a radius creates a curved transition. An eased edge is useful descriptive language, but it needs a drawing or approved sample if buyers expect a consistent profile.
Separate appearance from assembly requirements
Start by marking the edges users touch, the edges visible in the main product view, and the edges that participate in assembly. A decorative top perimeter may allow a broader transition. A lid registration shoulder, insert pocket, or narrow supporting ledge may require a more restricted treatment to preserve contact and clearance.
For a chamfer, state which face the width is measured on and how its angle is defined. For a radius, identify the intended curve and its transition into adjacent surfaces. Specify whether corner intersections should be blended, retain a visible meeting line, or follow a reference profile. Otherwise, identical straight-edge callouts can produce visibly different corners.
Use an illustrative callout carefully
For discussion only, a designer might propose a 0.8 mm chamfer at 45 degrees on an exposed upper edge. This is an illustrative design input, not a recommended universal value or a DeHong capability claim. The drawing would still need an agreed size tolerance, corner treatment, and applicable edge locations. Thin walls and local stone condition may require another profile.
On an ideal right-angle corner, the chamfer's setback along a face differs from the sloping bevel width. State the convention explicitly instead of leaving the inspector to infer it from a photograph. Check that all dimensions describe the finished part after edge processing.
Plan support before removing material
Small accessories provide limited gripping area. A useful prototype review therefore includes workholding, access to every edge, and a safe sequence for repositioning the part. Support should prevent movement without imposing damaging local loads on a thin rim or unsupported corner.
A proposed fixture needs clean contact surfaces and a repeatable locating method. Grit trapped between the part and its support can mark a finished face. Soft protection may reduce marking, but excessive compliance can allow the workpiece to tilt. The appropriate balance must be demonstrated on the actual geometry.
Ask the processor to identify tool entry and exit regions and places where the edge loses support. These are sensible inspection priorities during trials. Keep enough material for the agreed finishing sequence, while ensuring the planned allowance does not erase a narrow ledge or interfere with a neighboring feature.
Do not copy spindle speed, feed rate, abrasive sequence, or water-flow figures from an unrelated stone. Their suitability depends on the tool, machine, material, support, and operation. Any shop-floor parameters should come from the equipment and tooling guidance plus controlled trials, with appropriate dust, splash, and electrical safeguards.
Outline and opening references
Supplied product photographs for discussing form, arrangement and visible appearance. Confirm stone identity, dimensions and suitability for your project through sample review; these references are not a stock catalogue or a customer delivery case.
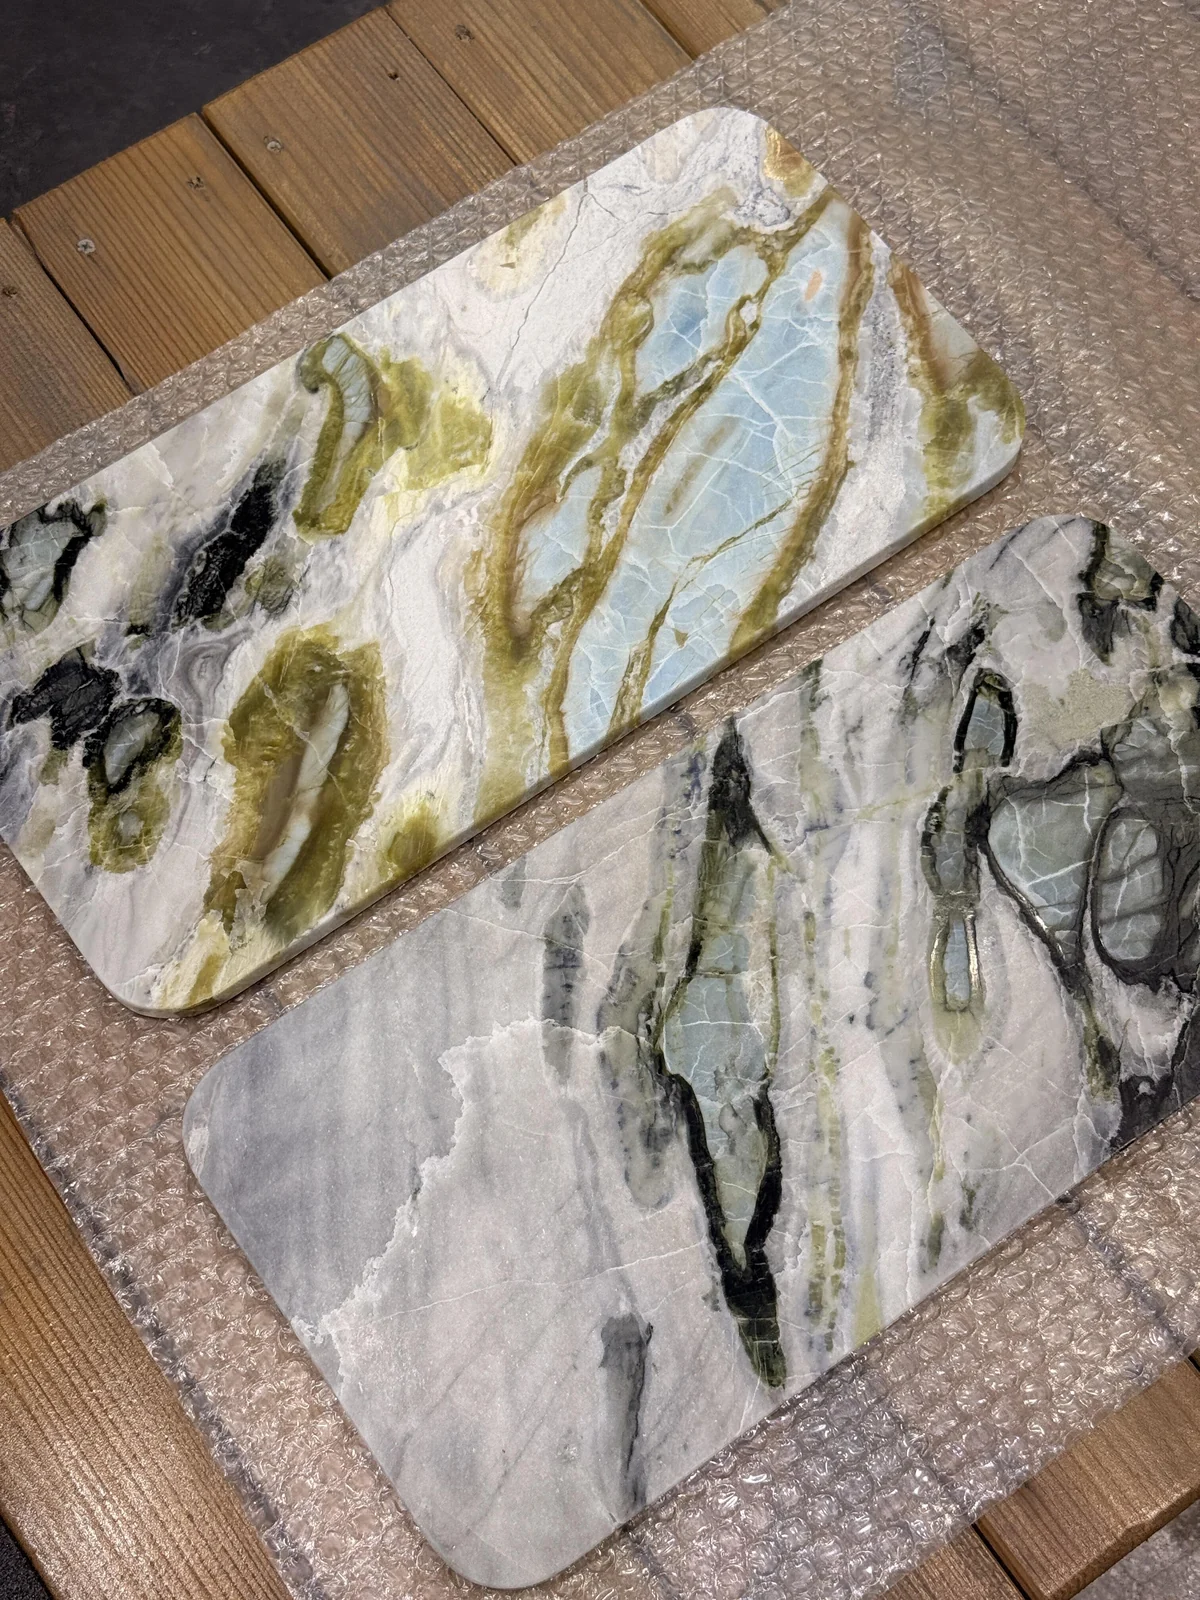

Separate profile formation from finish refinement
Establish geometry first
The initial edge operation should establish the intended profile while preserving the surrounding dimensions. Inspect it before investing in finer finishing. A glossy edge with an incorrect bevel width is still an incorrect edge, and later polishing may make correction harder by removing more stock.
Photograph suspect areas while the processing stage is known. If a corner chips, establish whether the defect was present in the blank, appeared during shaping, or developed during refinement. This separates material-selection questions from process questions and makes corrective decisions more useful.
Refine the surface without losing the profile
Abrasive refinement needs to remove earlier damage without unintentionally changing the edge form. Buehler's surface-preparation guidance discusses the relationship between abrasive refinement and damage removal; this is a general materials-preparation principle, not an onyx accessory machining recipe. Buehler grinding and polishing guidance
For prototype development, compare the edge after each proposed stage. Clean the part and the relevant equipment between abrasive changes so that remaining coarse particles do not create new scratches. Inspect under consistent lighting, then record whether the next stage improved the surface or merely increased gloss.
A compliant polishing tool can follow contours, but its use should be assessed for unwanted rounding of a nominally flat bevel or widening of a small radius. Pay particular attention where two edges meet. Extra hand finishing at that location can create an oversized corner blend even when the straight sections look consistent.
Measure the edge and inspect its appearance separately
Dimensional inspection and visual inspection answer different questions. A measuring method must be able to resolve the feature being assessed; an attractive photograph cannot prove a bevel size. Conversely, a dimension within tolerance does not establish a uniform finish.
For accessible profiles, the parties may agree to use an optical image with a scale, a profile comparison method, or another suitable measuring arrangement. A contact gauge must not bridge the feature being measured or sit on a chip. On translucent material, check that lighting produces a stable edge boundary rather than a misleading reflection.
Choose repeatable inspection positions, including corner transitions and areas where bands cross an edge. Use the same locating surfaces each time. If an edge position is defined relative to the base or a functional shoulder, reference that feature rather than an arbitrary high point on the polished exterior.
Agree in advance how to treat a reading near the acceptance limit. Measurement uncertainty belongs to the complete method, not just the displayed digits of an instrument; NIST describes contributions from observers, instruments, samples, and other conditions. NIST measurement uncertainty
Write a practical visual acceptance agreement
Define the normal viewing orientation, lighting, background, distance, and whether magnification is part of acceptance. Use agreed photographs or retained samples to illustrate acceptable and unacceptable chips, scratches, pits, edge waviness, and polish mismatch. These are proposed review criteria, not a universal stone grading standard.
Record whether filled areas are permitted, where they may occur, and how they should appear after finishing. Any repair needs approval under the project specification. Local blending to remove a chip can alter the silhouette or a mating clearance, so dimensional reinspection should follow rework.
Decorative onyx is vulnerable to chemical and abrasive attack, as the Natural Stone Institute notes. Cleaning products and finishing compounds therefore need material compatibility review; avoid assuming that a product suitable for quartz is suitable for calcite-based onyx. Natural Stone Institute on decorative onyx
Approve a representative prototype and preserve its meaning
A useful approval sample combines the intended edge, finish, material appearance, and any mating component. Review it dry and clean, using the agreed inspection conditions. If the article has a lid or insert, check operation after final finishing rather than relying on measurements taken earlier.
The approval record should identify the drawing revision, material reference, finish reference, measured features, photographs, and unresolved exceptions. Keep a retained physical reference when practical. Approval of one attractive piece does not establish unlimited consistency across all natural patterns or future material lots.
Before packing, protect exposed corners and keep accessories from striking one another. Packaging development should use the actual product shape and intended transport conditions. No edge treatment alone establishes shipping resistance, and this article makes no transport-test or durability guarantee.
Discuss your custom stone accessory
For a project review, send your CAD file or reference images, dimensions, preferred material, and quantity to DeHong Stone. Request written confirmation of the edge specification and prototype acceptance plan before treating any design value as a production commitment.
Website: www.dehongstone.com Email: hefeng@dehongstone.com WhatsApp: Contact DeHong Stone
Technical sources checked on October 7, 2026. Linked guidance supports general principles; it does not verify DeHong Stone's equipment or project-specific performance.
Frequently asked questions
Is a radius always better than a chamfer for onyx accessories?
No. The choice depends on handling, appearance, wall thickness, and fit. A radius may suit a touch surface, while a defined chamfer may better preserve a visual line. Compare both on representative material when the decision affects a critical edge.
Can polishing remove every edge chip?
A shallow defect may be removable within the agreed geometry. A deeper chip may require unacceptable material removal or an approved repair. Evaluate the remaining profile and functional dimensions before authorizing rework; a brighter surface alone does not resolve the defect.
What is the standard chamfer tolerance for decorative onyx?
There is no universal value established by this article. Agree a project-specific requirement after reviewing material, feature size, processing access, inspection method, and prototype results. Do not infer a finished-part tolerance from a machine's advertised resolution.
What should I send for an edge-finishing review?
Send CAD or dimensioned drawings, reference images, overall dimensions, material preference, quantity, finish expectations, and mating-part information. Mark the edges requiring special attention and describe how the product will be handled. Ask for written confirmation of the proposed profile and acceptance criteria.
Discuss the edge transition and lid clearance on the Capsule Box reference with the selected stone and a physical sample; an appearance reference does not establish machining tolerances.
Buyer questions for this project
Start with the short answer, then expand the project considerations before preparing your brief.
Q: How are dimensional tolerances agreed for custom stone accessories?
Short answer: Mark critical dimensions, fits and assembly requirements on the drawing, then agree feasible tolerances and inspection methods through technical review and sampling.
Project considerations
Distinguish overall size from the features that must fit another part, such as a recess, lid or insert. State the drawing revision, measurement references and any mating-component information. The stone, remaining sections, shape and finishing steps affect what should be reviewed. Record the accepted requirements with the sample and production specification; one prototype or a general process description does not establish a universal numerical tolerance.
Apply the guidance to your project
For a project-specific review, send your intended use, drawing or reference, dimensions, material preference, estimated quantity and delivery destination to DeHong Stone. The team can review which details need sample confirmation before quotation.
Website: www.dehongstone.com
Email: hefeng@dehongstone.com
WhatsApp: +86 139 8660 4493
General purchasing guidance is not a project quotation or a material test result. Confirm specifications, verification and terms for the selected sample.
Bring your drawing and project requirements.
Include your intended use, reference, dimensions, material preference and quantity. Agree the feasibility review and sample requirements in writing.